Call Us: 970-243-2929

Grand Daughter's Stuffed Dog

My granddaughter's stuffed dog lost his right eye and needed delicate surgery. It took a little thought because I didn't want to make the area around the eye hard with glue, and there wasn't much of a base - just stuffing and fabric. If I pushed a little the eye would sink inside the head. So I put enough of my glue to make a base, sanded the base of the eye (ouch!) and seated it gently in place. After curing it was perfect, and my granddaughter was very happy with the result.

More Repairs

stuffed dog repair
teak diorama

Teak Diorama Frame

We've done all sorts of different wood repair jobs, from chairs to tables and hutches and cedar chests.  Other projects we have worked on include dioramas (such as this one), picture frames, mirror frames, and even a slit drum. On this project we had to remove the frame because the diorama inside had shrunk. The frame was held on with sixteen penny nails. We removed the frame (delicately) and re-cut the miters (the angled corners) to fit the diorama. Then we glued it back on (without the nails) and gently filled some holes in the middle of the scene.

More Repairs

Picture Frame

This is a very nice antique picture frame we glued back together for the client. It's actually three frames nested one inside the other, starting with the outer part of reddish brown color, then the dark brown middle part, then the gold colored interior pieces. We glued together the outer and middle sections because that was enough to make the frame secure. Besides, it was better to re-glue as little as possible, in case someone ever wanted to replace any of it. Not likely, but one never knows. The cost to re-glue was about $200.00, because mitered corners (45 degree) are very hard to line up and clamp once the glue is applied. It didn't help either that the boards were not flat or straight, and because of previous repairs the edges of the angled corners were not straight. So we had to flatten the assembly, tweak the straightness of each board, and keep it square, all while the sucker kept trying to slip away and hide!

More Repairs

Picture frame
Chess table repair

Chess Table Re-Glue

These are a couple of pictures of a nice chess table which the client originally purchased in India, if I remember correctly.

Movers had pretty much disassembled the whole thing by the time we saw it. The top frame around the checkerboard had to be reglued along with all four legs and the apron between them. The drawers were okay, and the center of the top was okay also. When it was manufactured, someone used nails at the bottom corners of the drawers through each apron piece to hold the drawer slides. This caused severe splitting in the mahogany. Can you guess where we filled in a very large gap that was the result of a missing piece caused by a split from a nail?

More Repairs

Chess Table Gap Fill

Give up on locating the gap we filled? Okay, we'll tell you. The gap is the darker brown finger-sized stripe that starts at the bottom left corner of the drawer and extends left to the leg. Very hard to spot unless you know what to look for. The nails were not re-used so there should be no future splitting of the wood.

More Repairs

Chess table gap fill
wood antler repair

Wood Antler Repair

Another unusual and interesting project was the repair of some elk antlers for a wood carving on top of a mantle clock. The top pictures are before front and back, and the bottom pictures are after we finally got the suckers glued on. In the wild an elk will get new antlers every year, but it isn't supposed to happen with wood carvings. In our neck of the woods this is a carving of a six-point elk.

As you can probably tell, clamping was a, er, bear!

More Repairs

Antique Shoeshine Kit Box Front Before

Another interesting project we did was an antique oak shoeshine kit. The kit was used by the client's father and grandfather when they were boys. One of the top boards was warped and had to be steamed flat again, and it needed refinished. This is the front before picture.

More Repairs

antique shoeshine kit box
antique shoeshine kit box back before

Antique Shoeshine Kit Box Back Before

If you look closely at this picture of the back before work you can see discoloration around the top where the split top used to have a piece of leather tacked on across most of the length and width, acting as a hinge for the flip-top (which had the shoe rest screwed to the underside). The flip top (shoe rest is up in the picture) was flipped over to shine the shoes or to gain access to the supplies in the box.

More Repairs

antique shoeshine kit front after
antique shoeshine kit back after

Antique Wheelchair

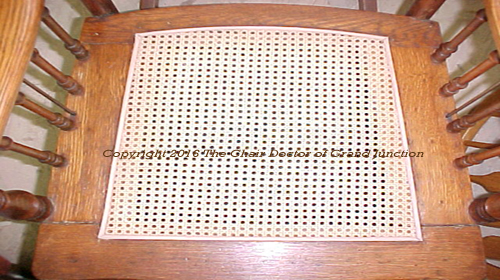
This is a wheelchair we repaired, recaned and refinished. The before picture (left) shows the broken cane, but the back was also very loose and had to be rebuilt. Much of the time with this project was taking the pieces off of the frame. There were a lot of bolts as you can tell. Cost was about $700.00 for rebuilding the back, re-caning the seat and back, and refinishing.

More Repairs

Antique wheelchair
image

Salad Bowl

Believe it or not, yes we even fixed a salad bowl and refinished it. You can see from the after pictures that there were splits in the middle which needed to be glued, then we needed to refinish it. The two dark splits had been there a while and we couldn't get them to disappear. But there was one newer split almost the width of the bowl which went away nicely. The lip of the bowl was not flat, which made it real fun to try and clamp. The client was very happy we saved her keepsake.

More Repairs